Showcasing allauth IdP: build an MCP server
Posted by Raymond Penners on 2026-05-29
Introduction
The allauth.idp (Identity Provider) package was introduced last year, yet it
remains relatively unknown. What better way to put it on people's radar than
building a demo? Given all the buzz around LLMs, let's showcase its capabilities
by building an MCP server that authenticates via OIDC, using nothing but plain
Django and django-allauth.
Installation
Skeleton
First, let's create a bare-bones project skeleton:
  mkdir mcpdemo
  cd mcpdemo
  git init
  mise use uv
  uv init
  uv add django 'django-allauth[idp-oidc]'
  uv run django-admin startproject myproject .
  uv run django-admin startapp myapp ./myproject/myapp
Basic allauth Installation
Next, configure django-allauth. Open settings.py and add:
  INSTALLED_APPS = [
      ...
      # Add these apps
      "allauth",
      "allauth.account",
      "allauth.idp.oidc",
  ]

  MIDDLEWARE = [
      ...
      # Add this middleware
      "allauth.account.middleware.AccountMiddleware",
  ]

  AUTHENTICATION_BACKENDS = [
      "django.contrib.auth.backends.ModelBackend",
      "allauth.account.auth_backends.AuthenticationBackend",
  ]
Then, set up routing. Edit myproject/urls.py to include:
  urlpatterns = [
      path("admin/", admin.site.urls),
      path("", include("allauth.idp.urls")),
      path("accounts/", include("allauth.urls")),
  ]
IdP Specific Settings
The allauth.idp package requires some additional configuration. Under the hood, token signing requires a private key. Generate one using:
openssl genpkey -algorithm RSA -out private_key.pem -pkeyopt rsa_keygen_bits:2048For demo purposes, you can simply inline the generated private_key.pem in your settings.py:
  IDP_OIDC_PRIVATE_KEY = """
  -----BEGIN PRIVATE KEY-----
  MIIEvgIBADANBgkqhkiG9w0BAQEFAASCBKgwggSkAgEAAoIBAQCVX7KO32TgyuzK
  ...
  uJR2webdty7MlApkMKe4Y0rQ
  -----END PRIVATE KEY-----
  """
For authorization, the MCP host (e.g. claude) needs to dynamically register an
OAuth 2.0 client. This requires enabling Dynamic Client Registration (DCR). By
default, allauth requires an initial access token for DCR requests, which we
need to disable for this demo. Add the following to settings.py:
  IDP_OIDC_DCR_ENABLED = True
  IDP_OIDC_DCR_REQUIRES_INITIAL_ACCESS_TOKEN = False
Finish & Test
With that in place, migrate your database and spin up the development server:
  uv run manage.py migrate
  uv run manage.py runserver
Visit http://localhost:8000 and confirm that Django is running.
Implement the MCP Server
Now we need to build the actual MCP server. Since this is unrelated to authentication, django-allauth does not provide anything for it.
Note: For production use, consider one of the available third-party MCP packages. We are rolling our own here purely to demystify what happens under the hood by providing a bare-bones, white-box implementation.
Add Routing
Edit myproject/urls.py and add a route for the app:
  urlpatterns = [
      ...
      path("", include("myproject.myapp.urls")),
  ]
Create myproject/myapp/urls.py with the following content:
  from django.urls import path

  from myproject.myapp.views import mcp

  urlpatterns = [
      path('mcp', mcp),
  ]
As you can see, there is just a single /mcp endpoint.
View
For this demo, our MCP server exposes a single tool to the MCP host: one that returns the Lost Numbers.
Replace myproject/myapp/views.py with the following content:
  """
  Note: For production use, consider one of the available third-party MCP
  packages. We are rolling our own here purely to demystify what happens under the
  hood by providing a bare-bones, white-box implementation.
  """

  from enum import IntEnum
  from functools import wraps
  import json
  from django.urls import reverse

  from django.http import HttpResponse, JsonResponse
  from django.views.decorators.csrf import csrf_exempt
  from allauth.idp.oidc.models import Token


  # Payload returned to the MCP host "as is" when it lists available tools.
  TOOLS = [
      {
          "name": "lost_numbers",
          "description": "Returns the lucky numbers from the TV series Lost.",
          "inputSchema": {"type": "object", "properties": {}},
      }
  ]


  def handle_initialize(params):
      return {
          "protocolVersion": "2024-11-05",
          "capabilities": {"tools": {}},
          "serverInfo": {"name": "myproject", "version": "0.1.0"},
      }


  def handle_tools_list(params):
      return {"tools": TOOLS}


  def handle_tools_call(params):
      if params.get("name") == "lost_numbers":
          # Our one and only demo tool.
          return {
              "content": [
                  {"type": "text", "text": json.dumps([4, 8, 15, 16, 23, 42])}
              ]
          }
      return {"isError": True, "content": [{"type": "text", "text": "Unknown tool"}]}


  METHODS = {
      "initialize": handle_initialize,
      "tools/list": handle_tools_list,
      "tools/call": handle_tools_call,
  }


  class JsonRpcErrorCode(IntEnum):
      PARSE_ERROR = -32700
      INVALID_REQUEST = -32600
      METHOD_NOT_FOUND = -32601


  class JsonRpcErrorResponse(JsonResponse):
      def __init__(self, code: JsonRpcErrorCode, message: str, id=None):
          super().__init__({"jsonrpc": "2.0", "error": {"code": code, "message": message}, "id": id})


  def mcp_authentication_required(view):
      """
      Demo 'authentication-required' decorator. If the token lookup succeeds,
      you may need to perform additional checks for a real world setup (e.g. user,
      scopes, resource).
      """

      @wraps(view)
      def wrapper(request, *args, **kwargs):
          auth = request.headers.get("Authorization", "")
          method, _, raw_token = auth.partition(" ")
          token = None
          if method.lower() == "bearer" and raw_token:
              token = Token.objects.lookup(Token.Type.ACCESS_TOKEN, raw_token)
          if not token:
              resource_url = request.build_absolute_uri(reverse("idp:oidc:configuration"))
              response = HttpResponse(status=401)
              response["WWW-Authenticate"] = f'Bearer resource_metadata="{resource_url}"'
              return response
          # TODO: Insert more ``token`` checks here...
          return view(request, *args, **kwargs)
      return wrapper


  @csrf_exempt
  @mcp_authentication_required
  def mcp(request):
      if request.method != "POST":
          return JsonRpcErrorResponse(JsonRpcErrorCode.INVALID_REQUEST, "POST required")
      try:
          body = json.loads(request.body)
      except json.JSONDecodeError:
          return JsonRpcErrorResponse(JsonRpcErrorCode.PARSE_ERROR, "Parse error")

      method = body.get("method")
      request_id = body.get("id")
      params = body.get("params", {})

      if request_id is None:
          return JsonResponse({}, status=202)

      handler = METHODS.get(method)
      if not handler:
          return JsonRpcErrorResponse(JsonRpcErrorCode.METHOD_NOT_FOUND, "Method not found", id=request_id)

      result = handler(params)
      return JsonResponse({"jsonrpc": "2.0", "result": result, "id": request_id})
Demo Time!
Before we can try things out, we need to make the MCP host aware of our server. The exact steps may vary depending on which MCP host you are using.
First, create a
.mcp.json file with the following content:
{
  "mcpServers": {
    "myserver": {
      "type": "http",
      "url": "http://localhost:8000/mcp"
    }
  }
}
Restart your MCP host and ensure it has picked up our MCP server. Then, initiate the authorization process:
  Myserver MCP Server

  Status:           ◯ connecting…
  Auth:             ✘ not authenticated
  URL:              http://localhost:8000/mcp
  Config location:  /myproject/myapp/.mcp.json

  ❯ 1. Authenticate
    2. Reconnect
    3. Disable

  ↑/↓ to navigate · Enter to select · Esc to back
Start the authentication process:
❯ /mcp
  ⎿  myserver requires authentication. Use the 'Authenticate' option.

  Authenticating with myserver…

  *  A browser window will open for authentication

  If your browser doesn't open automatically, copy this URL manually (c to copy)
  http://localhost:8000/identity/o/authorize?response_type=code&client_id=...

  If the redirect page shows a connection error, paste the URL from your browser's address bar:
  URL >

    Return here after authenticating in your browser. Press Esc to go back.
As you have not created an account yet, you should be presented with the signup page:
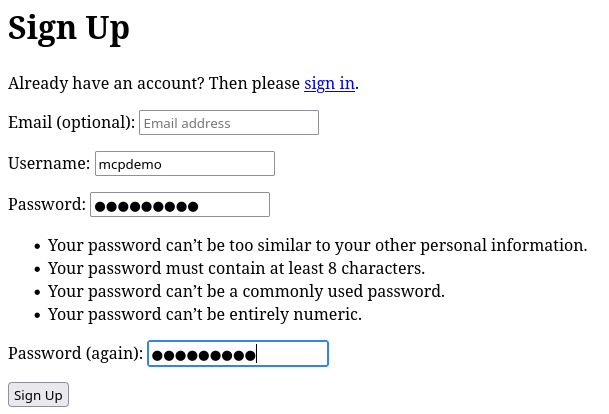
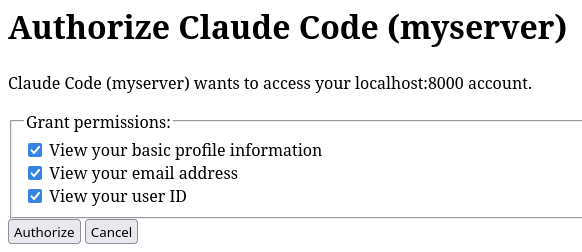
Fill out a username and password, after which you will be presented with the authorization screen where you can give consent:
After authorizing the MCP host, you will see:
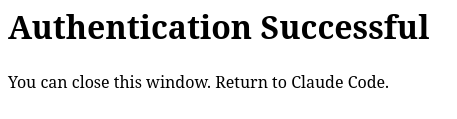
The MCP host will then display something like:
❯ /mcp
  ⎿  Authentication successful. Connected to myserver.
Finally, we can ask the MCP host to invoke our tool:
❯ list lost numbers using mcp tool

  Called myserver (ctrl+o to expand)

● 4, 8, 15, 16, 23, 42
Conclusion
As you can see, getting this up and running is straightforward – minimal moving parts, fully integrated in your Django project. No paid third-party services, no separate self-hosted identity servers – just Django and django-allauth.
Worth noting: allauth.idp is a completely separate, optional package. If all
you need is plain password-based login and signup, just installing
allauth.account is enough – none of the IdP-related code or dependencies are
pulled in. django-allauth remains as lean as you need it to be.
Support
Features like the Identity Provider package take a significant amount of effort to develop and maintain. If you or your organization rely on django-allauth, please consider sponsoring the project. Your support helps keep development going and ensures django-allauth continues to evolve. Thank you!
Next: django-allauth 65.19.0 released Previous: django-allauth 65.17.0 released